Roof lights are an increasingly popular way to bring natural light into the home, and they work particularly well with pitched roofs. By brightening interior spaces, improving ventilation, and creating striking architectural features, roof lights can transform the way a house looks and feels. However, installing roof lights for pitched roofs requires careful planning to ensure long-term performance, safety, and energy efficiency.
Why Choose Roof Lights for Pitched Roofs?
Pitched roof structures naturally lend themselves to roof lights because the angle allows rainwater to drain away easily, reducing the risk of water pooling. Beyond practical advantages, pitched roof lights offer:
- More natural light: Perfect for lofts, extensions, and converted attic spaces.
- Improved ventilation: Certain models can be opened to improve airflow.
- Aesthetic value: They add modern appeal while complementing traditional pitched roof architecture.
- Energy savings: Increased daylight reduces the reliance on artificial lighting.
With these benefits in mind, thoughtful installation ensures roof lights perform effectively for years to come.
Pre-Installation Planning
Before cutting into a pitched roof, careful planning is essential. Consider these steps:
- Assess the Roof Structure
- Identify rafters, trusses, and load-bearing points.
- Ensure the area where the roof light will be installed can structurally accommodate the opening.
- Choose the Right Location
- South-facing roof slopes bring in maximum light.
- East-facing windows allow soft morning light, while west-facing ones capture evening light.
- Avoid obstructed views caused by chimneys or tall trees.
- Check Building Regulations
- In many regions, installing roof lights for pitched roofs may require planning permission, particularly in listed buildings or conservation areas.
- Fire safety, thermal performance, and structural compliance must all be considered.
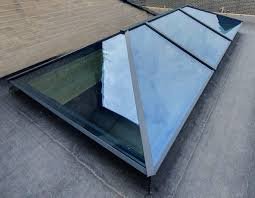
Selecting the Right Roof Light
Not all roof lights are the same, and choosing the right type is crucial for both performance and design.
- Fixed roof lights: Best for bringing in light without ventilation. Ideal in living rooms, dining areas, and staircases.
- Opening roof lights: Suitable for kitchens, bathrooms, or lofts where ventilation is necessary.
- Top-hinged windows: Easy to operate and provide wide openings.
- Centre-pivot windows: Offer flexible ventilation and are practical in tight spaces.
When selecting roof lights for pitched roofs, also consider glazing options. Double or triple glazing improves insulation, while solar-control coatings help manage heat gain.
Installation Tips
Proper installation is key to preventing leaks, drafts, and structural issues. Here are the most important tips:
- Work with Professionals
Installing roof lights involves structural modifications. Hiring experienced installers ensures proper fitting, sealing, and compliance with regulations. - Ensure Accurate Measurements
- Measure the opening carefully and match it with the manufacturer’s specifications.
- Account for flashing kits, which provide waterproofing around the roof light.
- Use Appropriate Flashing Kits
Flashing is essential to keep the roof waterproof. Kits are designed for different roofing materials (slate, tile, etc.), so choosing the right one prevents leaks. - Check the Roof Pitch Compatibility
Roof lights are designed for specific roof angles. Most models work within a range of 15°–90°. Installing outside the recommended pitch can compromise drainage and cause water ingress. - Install Adequate Insulation
To prevent heat loss, insulate around the frame during installation. This also reduces condensation risks. - Weatherproof Thoroughly
Apply seals carefully and test for water resistance before completing the installation. Skipping this step may lead to costly repairs later.
Post-Installation Considerations
Once roof lights are installed, ongoing care ensures they remain in top condition.
- Cleaning and Maintenance: Keep the glass clean for maximum light penetration. Many models feature self-cleaning coatings, but periodic washing is still necessary.
- Condensation Control: Ensure good ventilation in the room to prevent condensation buildup.
- Blinds and Shading: Consider adding blinds to regulate glare and heat gain in summer months.
- Security: Ensure locking mechanisms are strong, especially for accessible roof windows.
Common Mistakes to Avoid
When installing roof lights for pitched roofs, avoid these frequent errors:
- Cutting into structural rafters without reinforcement.
- Choosing the wrong flashing kit for the roofing material.
- Ignoring the roof pitch angle requirements.
- Overlooking insulation, leading to heat loss and drafts.
- Attempting DIY installation without proper skills or tools.
Avoiding these mistakes ensures a safe, durable, and efficient installation.
Final Thoughts
Installing roof lights for pitched roofs is a smart way to maximize natural light, improve ventilation, and add architectural character to a home. Success depends on choosing the right type of roof light, careful planning, and professional installation. By considering roof pitch, flashing, insulation, and ongoing maintenance, homeowners can enjoy bright, energy-efficient spaces for years to come.
Roof lights are more than just functional—they’re transformative, turning underused or dimly lit rooms into inviting, modern living areas. With the right installation tips and considerations in mind, they can become one of the most rewarding additions to any pitched-roof property.